API Deployment with NestJS, Docker, and PostgreSQL on Railway
Throughout previous weeks, we built REST controllers, services, repositories with TypeORM, and authentication mechanisms using JWT. All of this development took place on our local workstation (localhost). However, the ultimate goal of web engineering is not running software in isolation, but delivering it to real users, mobile clients, and frontend applications across the internet reliably, securely, and continuously.
In this guide, we will explore the concept of deployment, the fundamental role of Docker containerization using multi-stage architectures, and the step-by-step production rollout of a NestJS backend connected to a managed PostgreSQL relational database on the Railway cloud platform.
1. Theoretical Foundations: What Does Deployment Mean?
Deployment is the set of technical and operational procedures required to transition an application from a developer's local environment to cloud servers or hosting infrastructure, making it operational, monitored, and globally accessible over the network.

Key Differences: Local Environment vs. Production Environment
| Technical Criterion | Local Environment (Development) | Production Environment (Cloud) |
|---|---|---|
| Availability | Ephemeral (stops when the laptop is closed or terminal terminated). | Continuous 24/7 with automatic restarts upon crashes (self-healing). |
| Addressing | Private loopback (127.0.0.1 or localhost:3000). | Public domain with global DNS resolution (https://api.yourdomain.com). |
| Network Encryption | Plaintext HTTP (insecure). | Mandatory HTTPS with managed TLS/SSL certificates. |
| Data Persistence | Local database instance or temporary disk container. | Managed persistent SSD volumes with automated backups. |
| Compilation | Interpreted runtime with hot-reload (ts-node / start:dev). | Compiled, minified, and heavily optimized JavaScript code (dist/main.js). |
2. Requirements for Deployment
Before deploying to the cloud, modern backend architectures must satisfy rigorous industry standards (aligned with the Twelve-Factor App methodology):
- Strict decoupling of code and configuration: No passwords, cryptographic keys, or database URLs should ever be hardcoded into the source code. All sensitive settings must be injected at runtime through environment variables.
- Reproducible and portable artifact: The repository must maintain a lockfile (
package-lock.json) and a deterministic build recipe (a Dockerfile) ensuring that the application builds with identical Node.js runtimes and package versions on any cloud provider worldwide. - Database lifecycle management: The persistence engine (PostgreSQL) must run in a managed environment with persistent volume storage, guaranteeing that data remains intact even if application containers restart or redeploy.
- Automated version control: All source code must be versioned in a GitHub repository, serving as the automated trigger for Continuous Integration and Continuous Deployment (CI/CD) pipelines.
3. Why Dockerize Our Backend?
In traditional software development, one of the most persistent hurdles is the notorious "it works on my machine" syndrome. Discrepancies between the Node.js version installed on a developer's OS, system-level native libraries, and architectural variations between Windows, macOS, and Linux often trigger catastrophic failures when pushed to remote servers.
Docker solves this challenge by bundling application source code, the exact Node.js runtime, pinned dependencies, and network configurations inside an immutable image.

Technical Advantages of Containerization
- Total Isolation: Eliminates the need to install PostgreSQL or native build toolchains on your host machine.
- Immediate Portability: The exact container image tested locally runs without behavioral surprises across Railway, AWS, DigitalOcean, or Google Cloud.
- Reduced Attack Surface: Containers run in sandboxed user namespaces, exposing only explicitly declared ports.
- Team Standardization: Onboarding developers only need to clone the repository and run a single command to instantiate an environment identical to production.
4. Multi-Stage Builds: The NestJS Dockerfile
Because NestJS is written in TypeScript, we cannot execute .ts source files directly in production; Node.js natively executes standard JavaScript. Furthermore, bundling heavy development dependencies such as the TypeScript compiler (tsc), testing frameworks (jest), or type definitions (@types/*) into a production container is an antipattern.
To address this, we leverage a Multi-Stage Build pattern, separating the pipeline into three isolated stages:

Below is the optimized Dockerfile. Inspect the line-by-line comments to understand each directive:
# ==============================================================================
# STAGE 1: Dependency Resolution and Download (deps)
# ==============================================================================
# We start from a minimal Alpine Linux image running Node.js 20
FROM node:20-alpine AS deps
WORKDIR /app
# Copy only package manifests to maximize Docker layer caching.
# If package.json and package-lock.json are unchanged, Docker reuses cached layers.
COPY package.json package-lock.json ./
# 'npm ci' (Clean Install) guarantees a deterministic, reproducible install
# based strictly on package-lock.json, including development tooling needed to build
RUN npm ci
# ==============================================================================
# STAGE 2: TypeScript Compilation to JavaScript (builder)
# ==============================================================================
FROM node:20-alpine AS builder
WORKDIR /app
# Import dependencies resolved in the previous stage (deps)
COPY /app/node_modules ./node_modules
# Copy entire project source code
COPY . .
# Run the NestJS compiler ('nest build').
# Compiles TypeScript source in /src into optimized JavaScript under /app/dist
RUN npm run build
# ==============================================================================
# STAGE 3: Final Production Image (runner)
# ==============================================================================
# This is the ONLY image delivered and executed on the Railway cloud server
FROM node:20-alpine AS runner
WORKDIR /app
# Configure production environment flag to activate framework runtime optimizations
ENV NODE_ENV=production
# Re-copy package manifests
COPY package.json package-lock.json ./
# Install EXCLUSIVELY production dependencies (--omit=dev),
# discarding TypeScript, linters, compilers, and test suites
RUN npm ci --omit=dev
# Copy compiled JavaScript output from the builder stage
COPY /app/dist ./dist
# Document the internal port exposed by the service
EXPOSE 3000
# Final entrypoint: Node executes compiled JavaScript directly
CMD ["node", "dist/main"]
In a conventional setup, node_modules containing development dependencies alongside raw TypeScript source code can easily exceed 1.2 GB. By leveraging multi-stage builds, the final production image (runner) encapsulates only Node.js Alpine, production runtime dependencies, and the compiled dist/ directory, resulting in a lightweight footprint of approximately ~140 MB. This produces rapid cloud deployments and reduced container memory usage.
5. Local Orchestration with Docker Compose
During local development, we need to run PostgreSQL alongside our NestJS backend without having to install and manage manual services on our host operating system.
The docker-compose.yml file coordinates both containers inside a private bridged network:
services:
  # ----------------------------------------------------------------------------
  # Service 1: PostgreSQL Relational Database
  # ----------------------------------------------------------------------------
  postgres:
    image: postgres:16-alpine
    container_name: postgres-db
    restart: always
    environment:
      POSTGRES_USER: ${DB_USERNAME}
      POSTGRES_PASSWORD: ${DB_PASSWORD}
      POSTGRES_DB: ${DB_DATABASE}
    ports:
      # Port mapping: Host port : Internal container port
      # Using 5435 externally to prevent collisions with any local PostgreSQL instances
      - "${DB_PORT_EXTERNAL:-5435}:5432"
    volumes:
      # Persistent volume ensuring records survive container restarts
      - postgres_data:/var/lib/postgresql/data
    networks:
      - nestjs-network

  # ----------------------------------------------------------------------------
  # Service 2: NestJS Backend (Optional for local containerized end-to-end testing)
  # ----------------------------------------------------------------------------
  api:
    build:
      context: .
      dockerfile: Dockerfile
    container_name: nestjs-api
    restart: always
    environment:
      PORT: ${PORT}
      DB_TYPE: ${DB_TYPE}
      # Inside Docker network, host resolves directly to service name 'postgres'
      DB_HOST: postgres
      DB_PORT: 5432
      DB_USERNAME: ${DB_USERNAME}
      DB_PASSWORD: ${DB_PASSWORD}
      DB_DATABASE: ${DB_DATABASE}
      DB_SYNCHRONIZE: ${DB_SYNCHRONIZE}
      JWT_SECRET: ${JWT_SECRET}
      JWT_EXPIRES_IN: ${JWT_EXPIRES_IN}
      SALT_ROUNDS: ${SALT_ROUNDS}
    ports:
      - "${PORT:-3001}:3000"
    depends_on:
      - postgres
    networks:
      - nestjs-network

# ------------------------------------------------------------------------------
# Network and Volume Declarations
# ------------------------------------------------------------------------------
networks:
  nestjs-network:
    driver: bridge

volumes:
  postgres_data:
    driver: local
6. Environment Variables (.env.example)
To protect application secrets, the .env file containing sensitive credentials must never be committed to version control. Instead, provide a template named .env.example so that teammates and deployment services know exactly which keys are required.
Create or update .env.example at the root of your NestJS project:
# ==============================================================================
# HTTP Server Configuration
# ==============================================================================
PORT=3001

# ==============================================================================
# PostgreSQL Database Settings
# ==============================================================================
DB_TYPE=postgres
DB_HOST=localhost
DB_PORT=5432
DB_PORT_EXTERNAL=5435
DB_USERNAME=postgres
DB_PASSWORD=postgres
DB_DATABASE=interfaces3
DB_SYNCHRONIZE=true

# ==============================================================================
# Authentication & Cryptography (JWT)
# ==============================================================================
JWT_SECRET=change_this_in_production
JWT_EXPIRES_IN=1h

# ==============================================================================
# Hashing Parameters
# ==============================================================================
SALT_ROUNDS=10
In local environments, DB_SYNCHRONIZE=true allows TypeORM to automatically generate and alter database schemas from entities. In production environments, this setting must always be set to false once initial schemas are created, relying exclusively on controlled migrations to prevent catastrophic data loss across existing tables.
7. Production Deployment with Railway
Railway is a modern cloud infrastructure platform designed to streamline database provisioning, container hosting, and networking without traditional cloud configuration overhead. Below is the step-by-step production deployment workflow:
Create a Project and Provision PostgreSQL on Railway
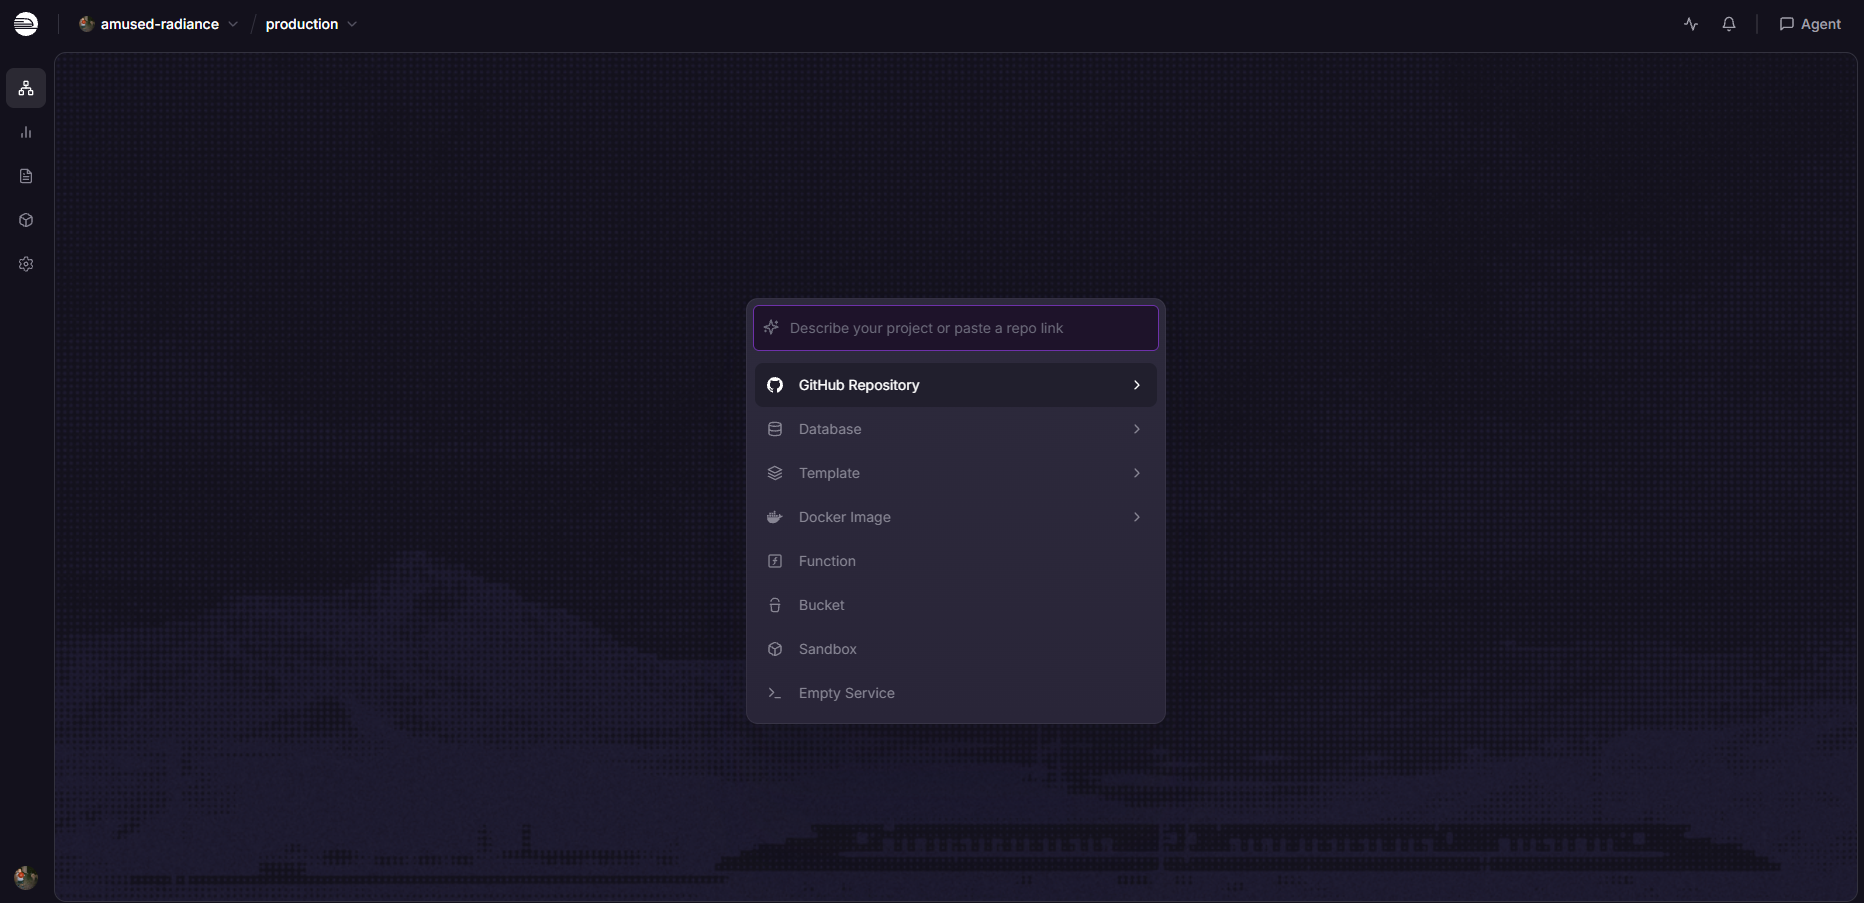
- Log in to your account at Railway.app and create a new project by clicking New Project.
- In the deployment options menu, select Database:
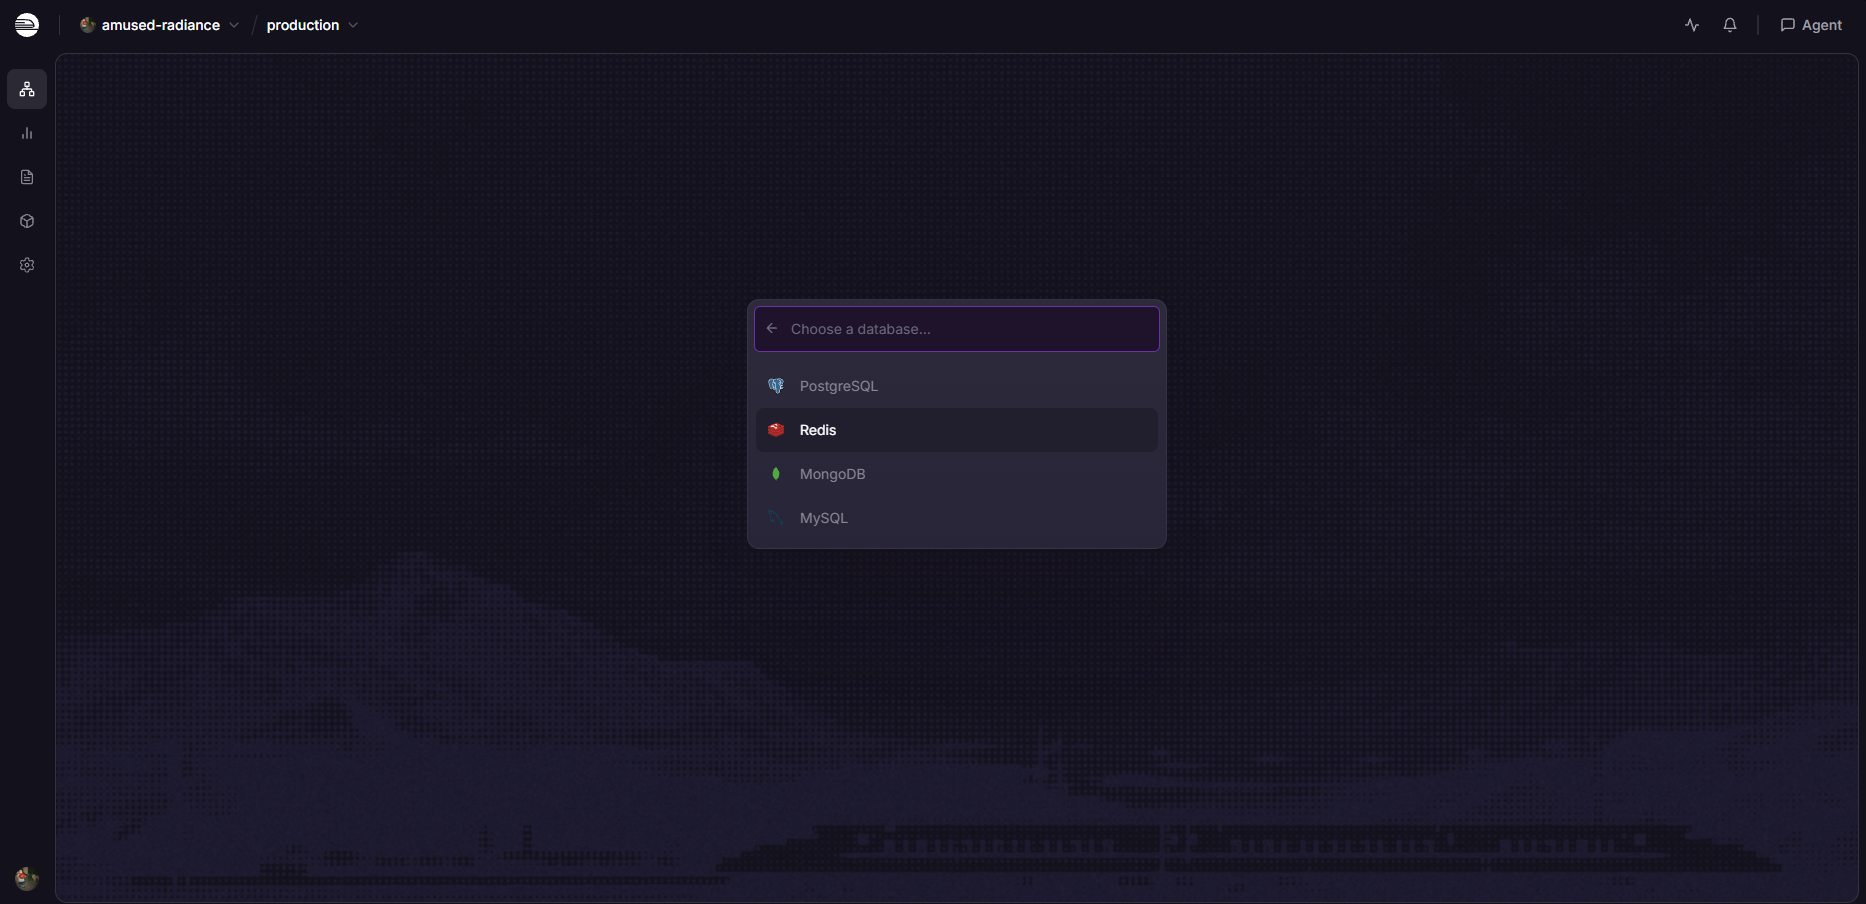
- From the list of available database engines, select PostgreSQL:
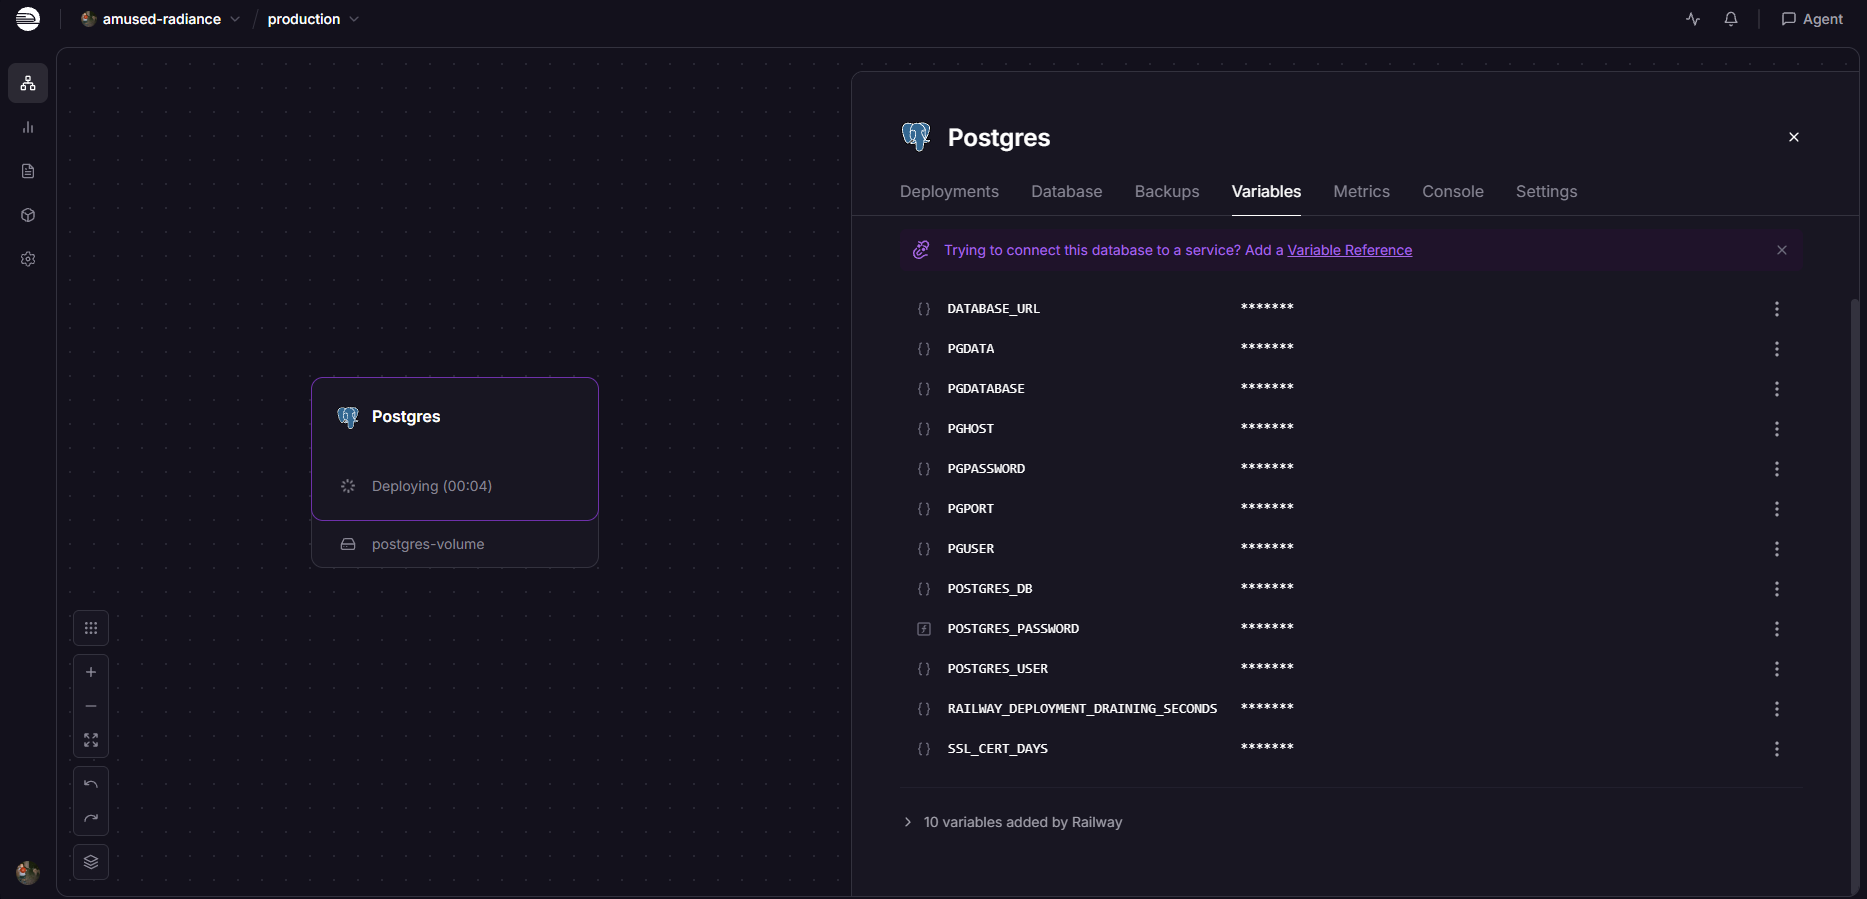
- Railway initializes the PostgreSQL container alongside its dedicated persistent storage (
postgres-volume). Clicking on the Postgres service node and opening the Variables tab displays the auto-generated connection credentials:
Enable Public Access for Database Management Tools (DBeaver)
To inspect tables, run manual SQL queries, and verify schema migrations from a desktop client (DBeaver or DataGrip), enable a public TCP port:
- Click on the Postgres node on your Railway canvas.
- Navigate to the Settings tab and locate the Networking section.
- Click on the Add Public Access button:
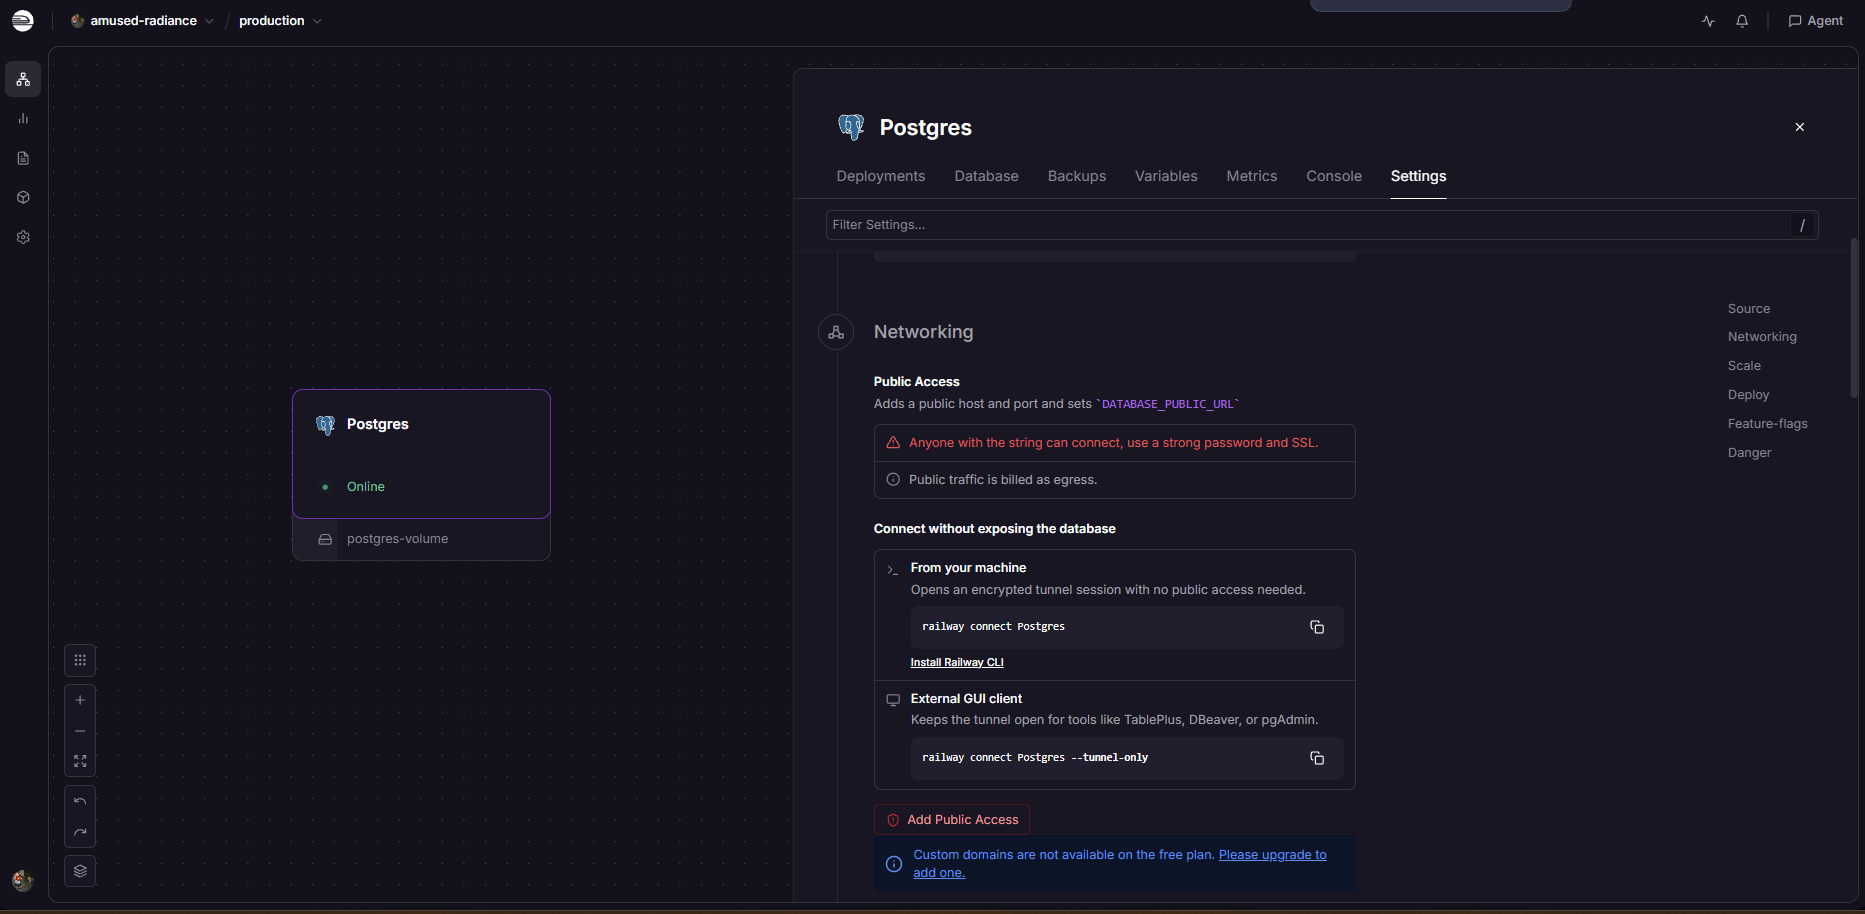
Railway will generate a public connection string matching the format:
postgresql://postgres:PASSWORD@sakura.proxy.rlwy.net:PORT/railway
ISP DNS Resolution Fallback for DBeaver
In various regions and residential Internet Service Providers (ISPs), local DNS resolvers fail to resolve dynamic proxy hostnames provided by Railway (e.g., sakura.proxy.rlwy.net), resulting in Unknown Host or Connection Timed Out errors when attempting to connect in DBeaver.
The Direct Solution: Instead of entering the alphanumeric domain into the DBeaver Host field, input the direct public IPv4 address of the proxy (for example: 66.33.22.220).
If the IP address changes or your provider cannot resolve the domain, obtain the active IP address directly through command-line network diagnostics:
- Windows (PowerShell / CMD)
- macOS and Linux
Open your Windows terminal and execute nslookup targeting your proxy domain:
nslookup sakura.proxy.rlwy.net
Sample terminal output:
Server:   UnKnown
Address:  192.168.1.1

Non-authoritative answer:
Name:      sakura.proxy.rlwy.net
Addresses: 66.33.22.220
Copy the value listed under Addresses (66.33.22.220) and paste it into the Host field of your DBeaver connection settings, retaining the assigned TCP port.
Open your terminal and query the DNS record using dig, host, or nslookup:
# Option 1: Retrieve only the direct IP address with dig
dig +short sakura.proxy.rlwy.net

# Option 2: Standard query with nslookup
nslookup sakura.proxy.rlwy.net

# Option 3: Query using host
host sakura.proxy.rlwy.net
Use the resolved IP address in your DBeaver connection settings.
Connect the GitHub Repository on Railway
With the database secured, proceed with deploying the backend:
- On your Railway project canvas, click + New or press
Ctrl + K(orCmd + K). - Select GitHub Repository:
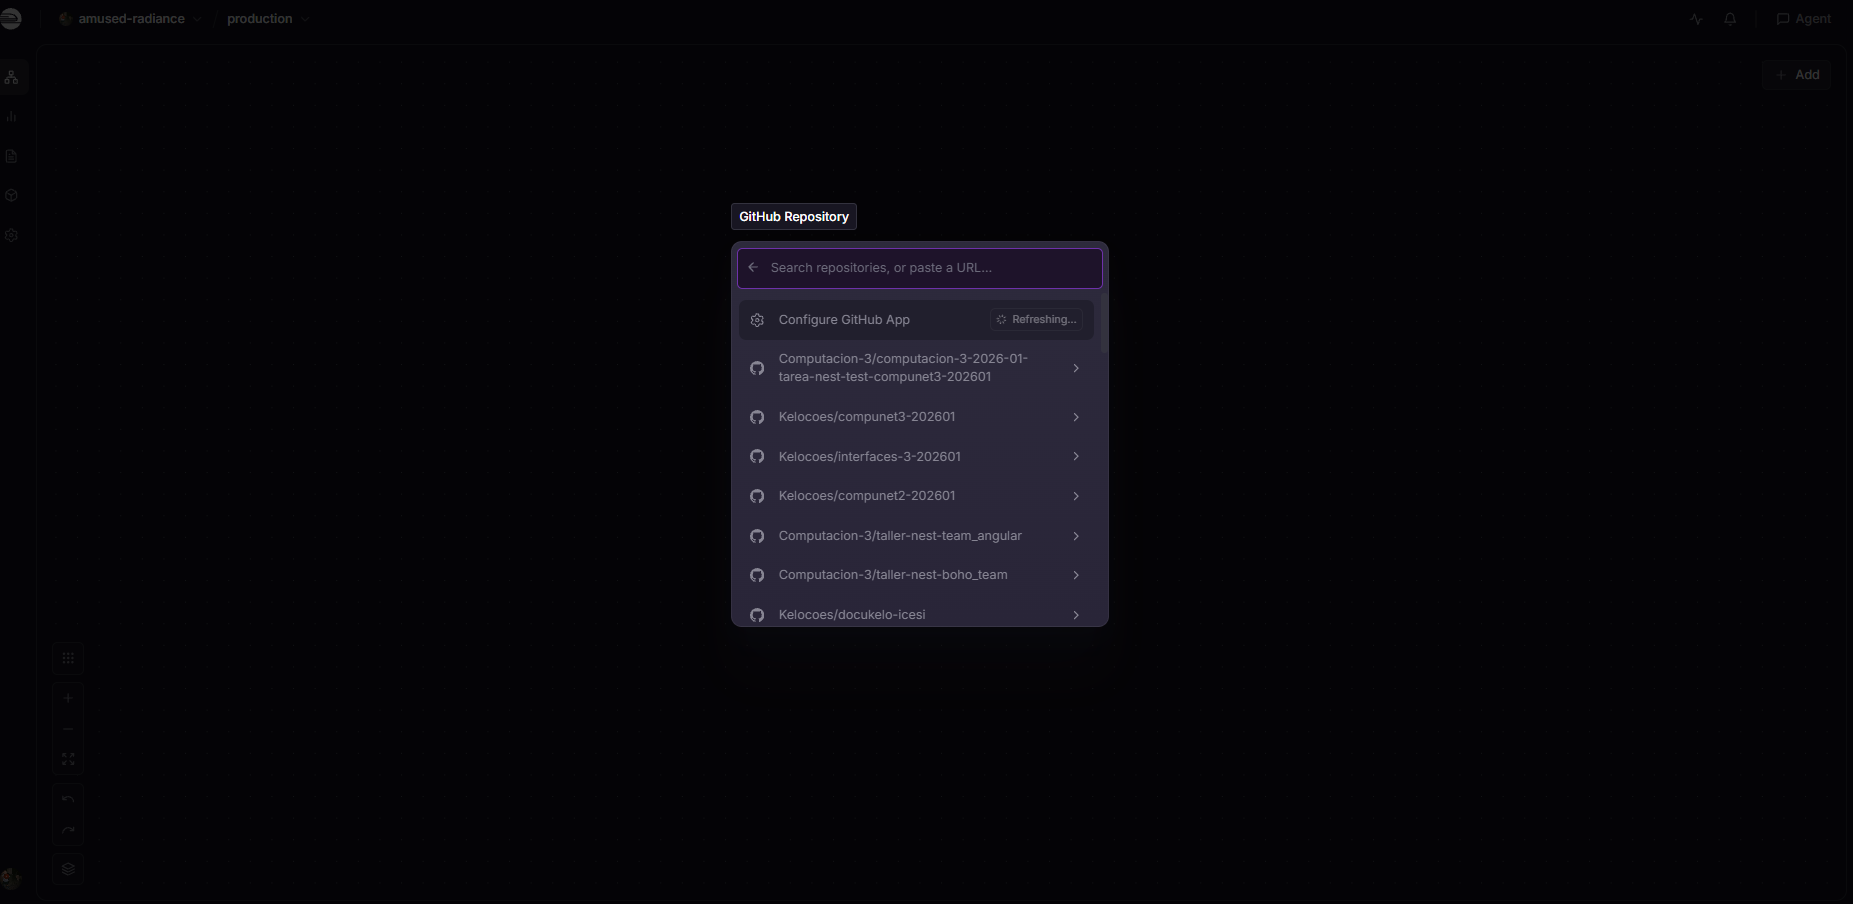
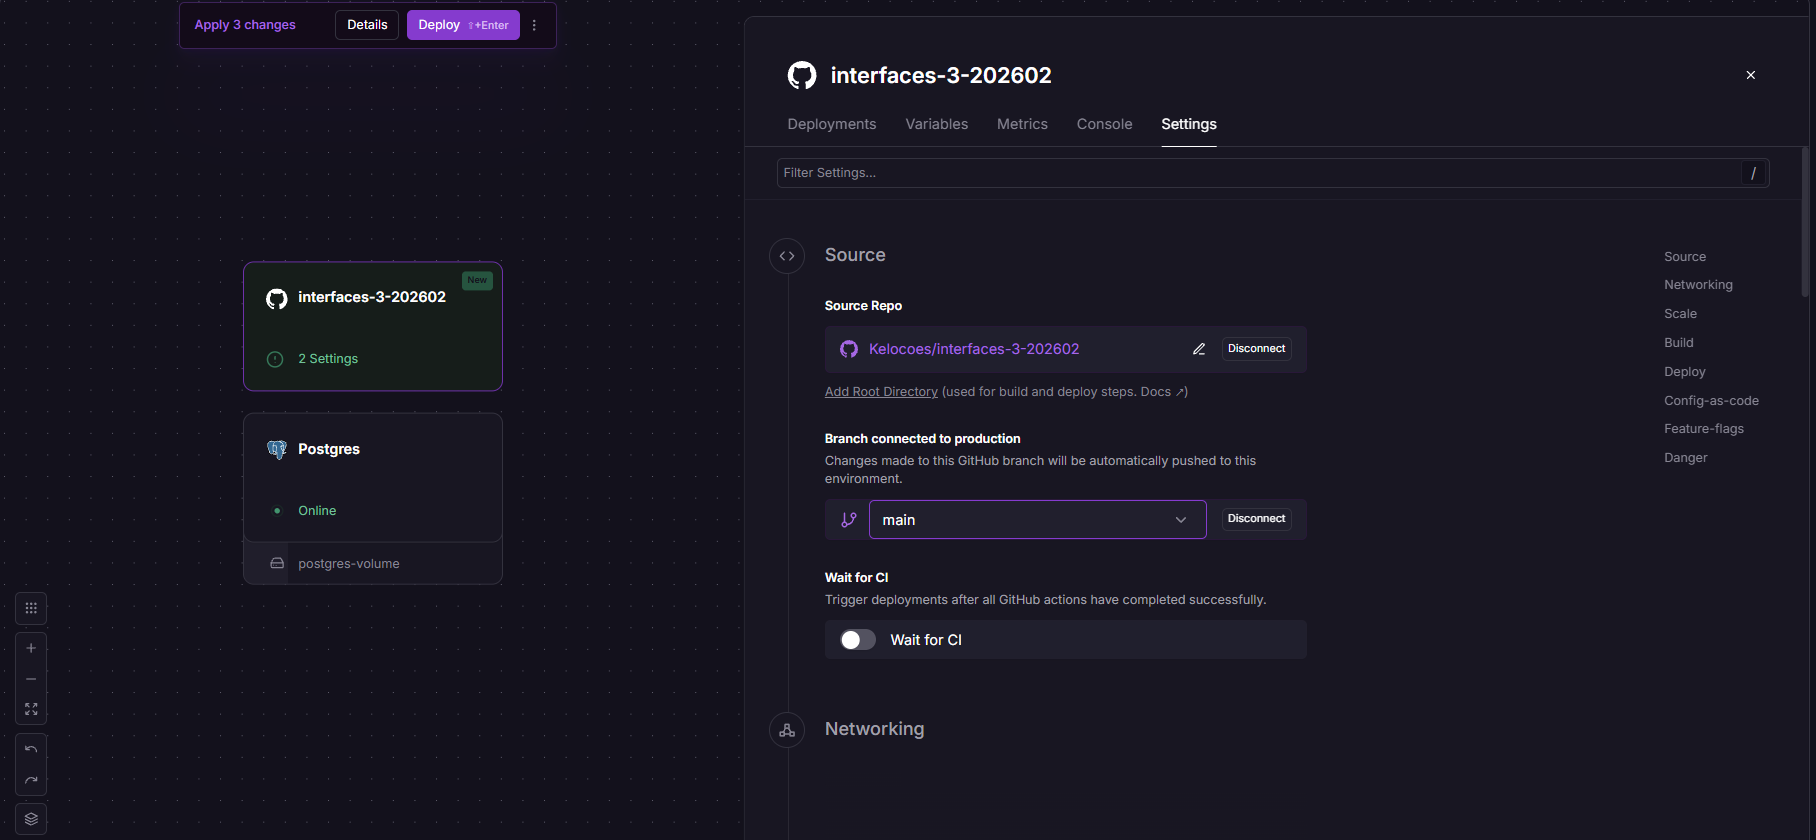
- Choose the repository hosting your NestJS backend (for example:
Kelocoes/interfaces-3-202602). - Confirm that the connected branch is
main:
Configure Build Engine to Dockerfile
By default, Railway attempts to compile Node.js projects using generic cloud builders (Railpack or Nixpacks). To ensure Railway executes our custom multi-stage build defined in Dockerfile:
- Select the NestJS backend service node on the canvas.
- Go to the Settings tab and scroll to the Build section.
- Under the Builder selector, switch from Railpack to Dockerfile:
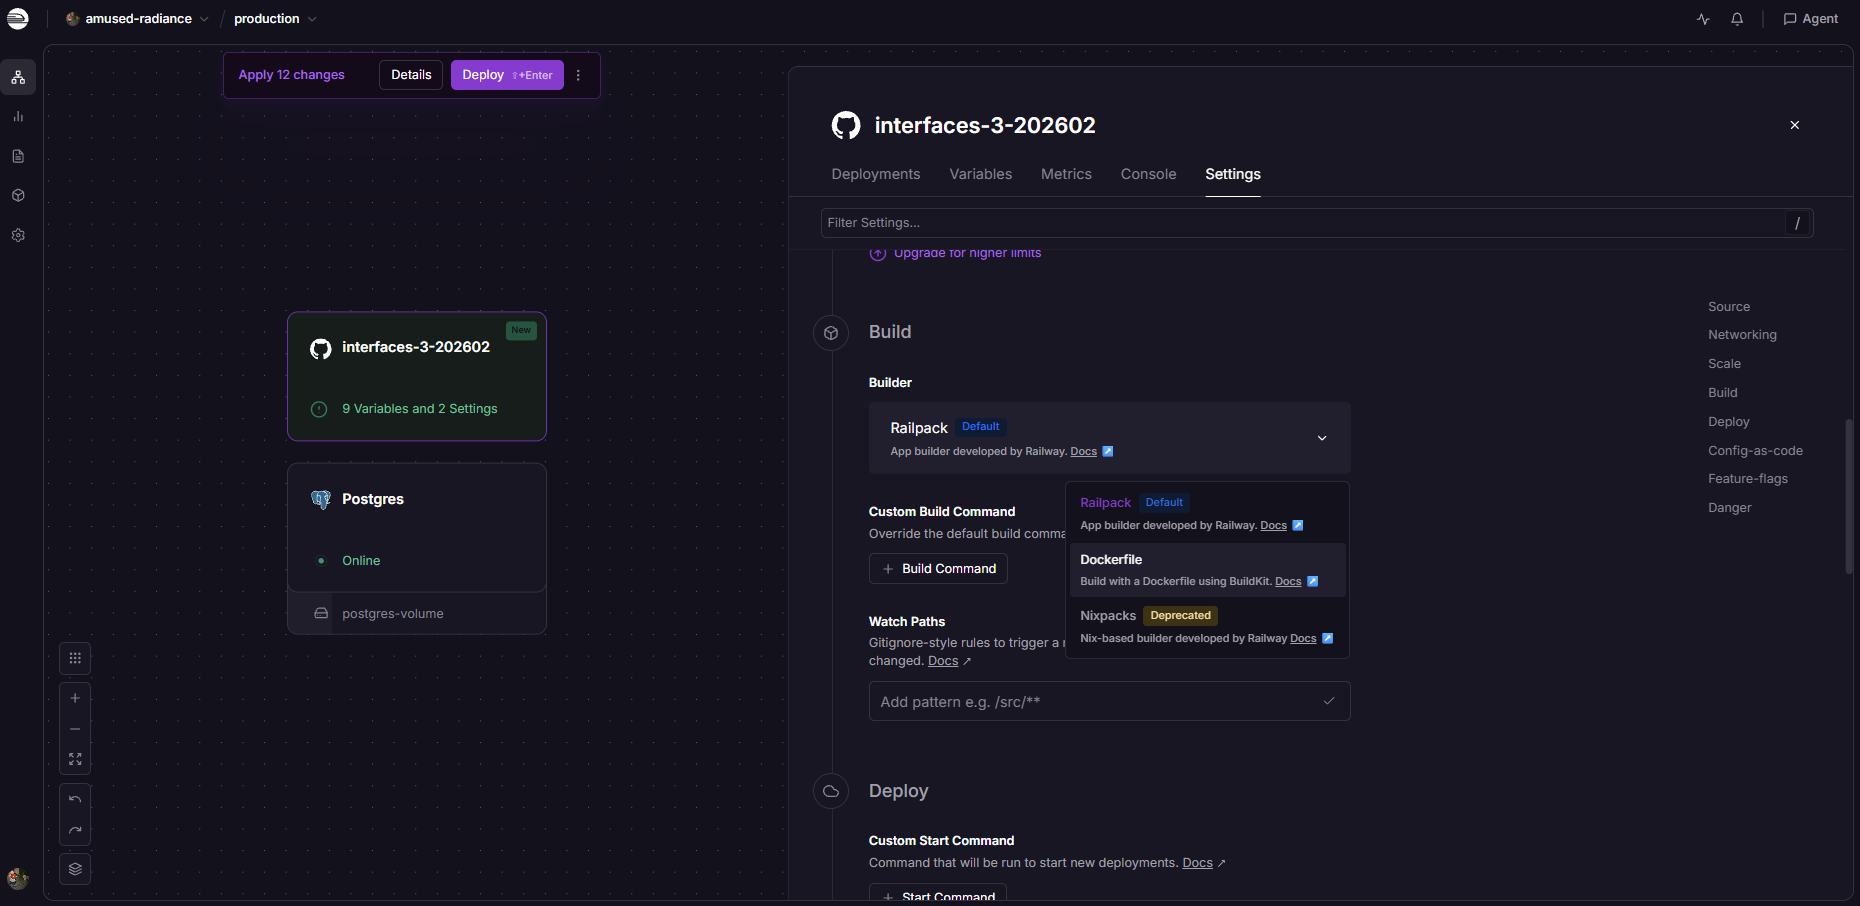
Railway will now invoke Docker BuildKit to build across all three stages (deps, builder, runner).
Inject Environment Variables into Backend
To allow the backend to connect with PostgreSQL and sign JWT tokens, provide the production variables:
- In the NestJS service, click on the Variables tab:
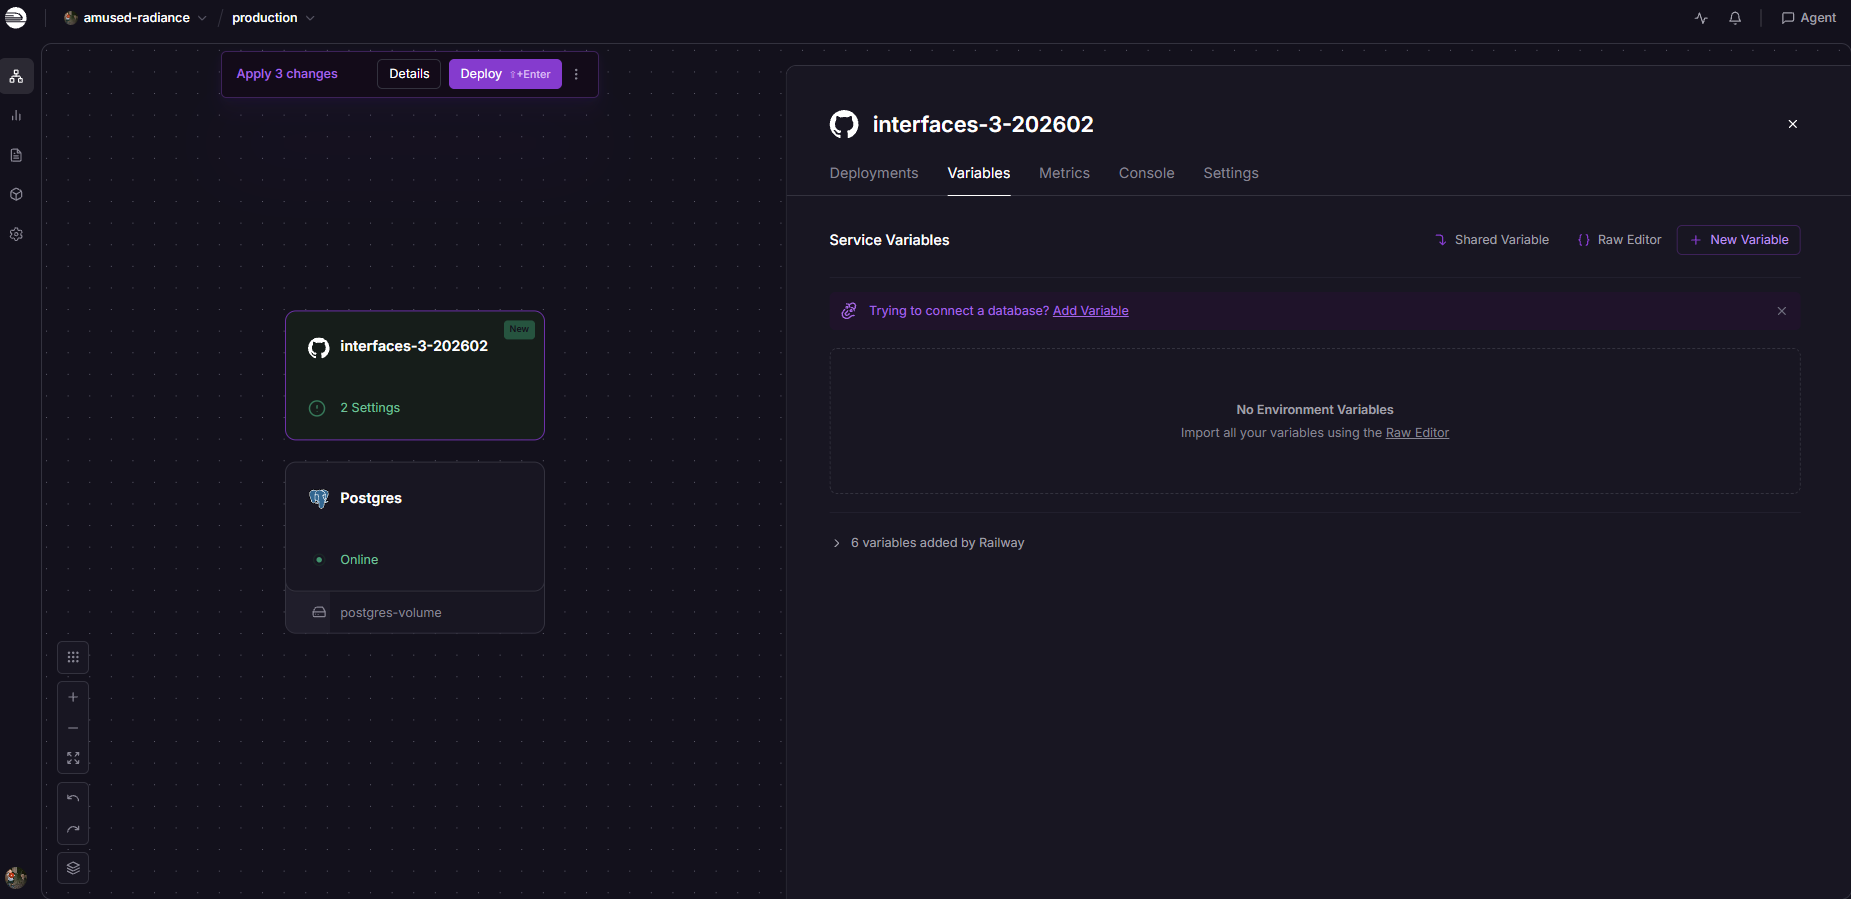
- Click the Raw Editor button in the upper-right corner to inject variables in bulk.
- Paste the corresponding production values:
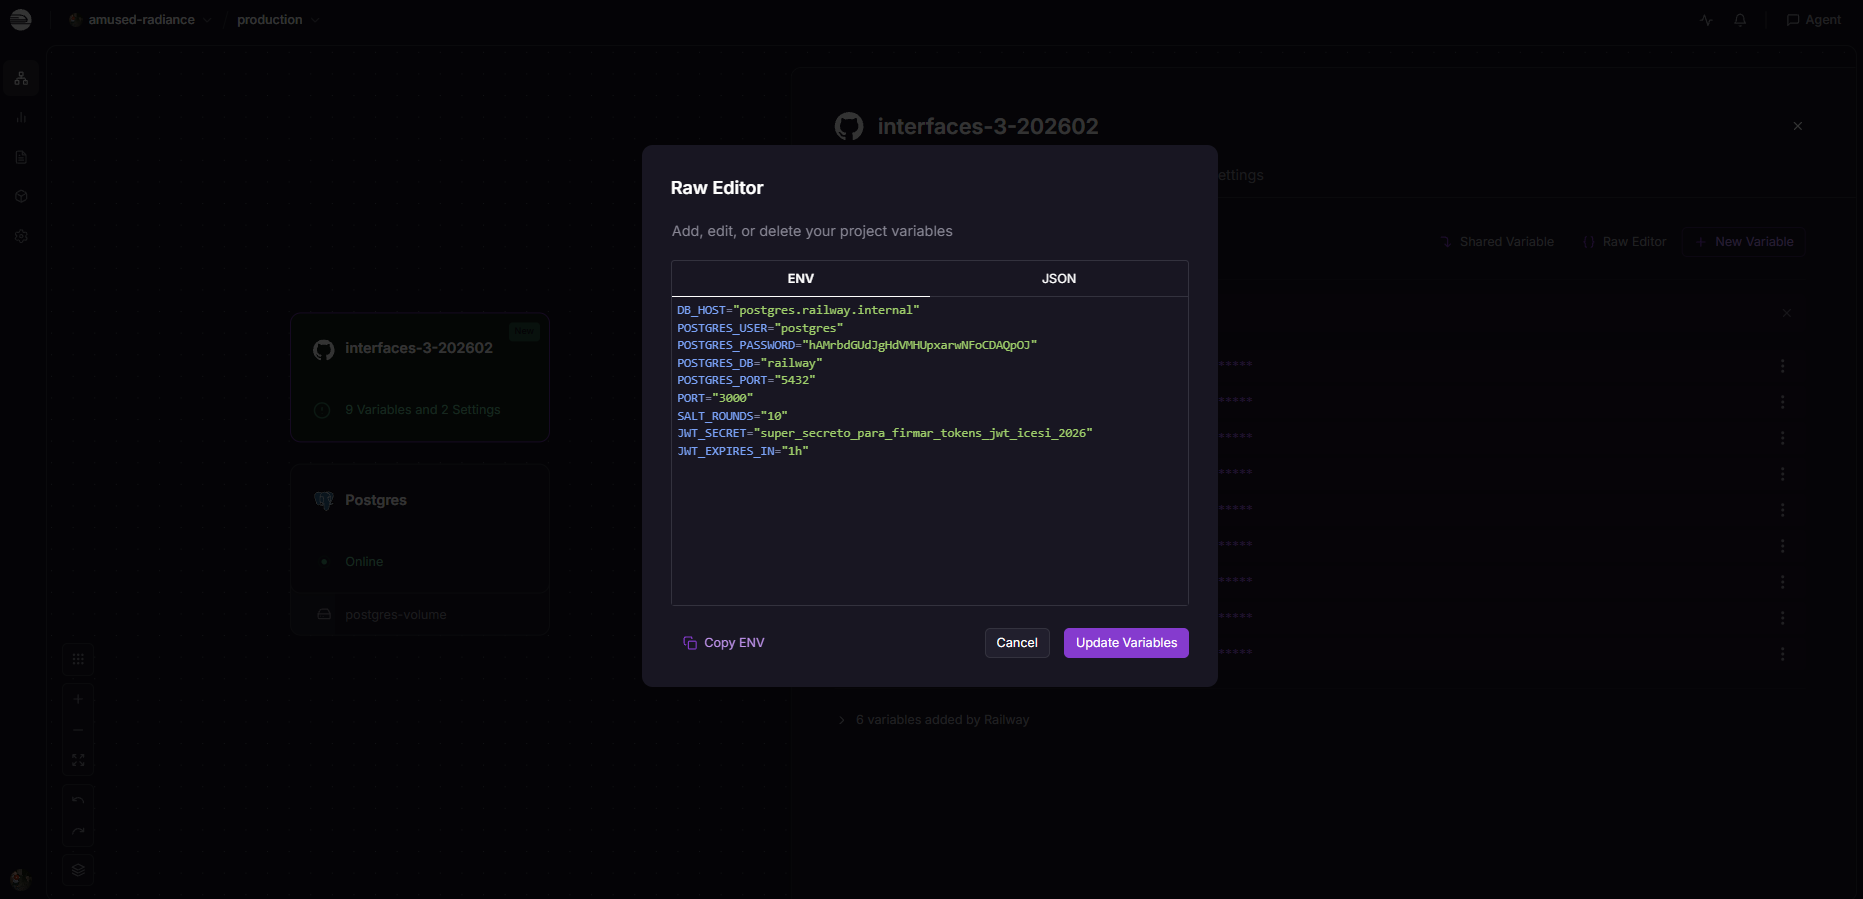
# Internal database host inside the private Railway mesh network
DB_HOST="postgres.railway.internal"
POSTGRES_USER="postgres"
POSTGRES_PASSWORD="YOUR_RAILWAY_AUTOGENERATED_PASSWORD"
POSTGRES_DB="railway"
POSTGRES_PORT="5432"

# Container internal HTTP listening port
PORT="3000"

# JWT and bcrypt security parameters
SALT_ROUNDS="10"
JWT_SECRET="highly_secure_production_secret_key_icesi_2026"
JWT_EXPIRES_IN="1h"
Notice that in production, DB_HOST is neither localhost nor a public IP, but postgres.railway.internal. This routes traffic through Railway's private, encrypted internal network mesh without exposing database traffic to the public internet or incurring egress bandwidth fees.
- Click Update Variables. Railway will detect configuration changes and automatically trigger a clean redeploy.
Generate Public Domain and Verify Deployment
- Navigate to the Settings tab of the NestJS service, locate the Networking section, and click Generate Domain.
- Railway will issue an SSL-secured public domain, such as:
https://interfaces-3-production.up.railway.app
- Open the Deployments tab and click View Logs. You should observe standard NestJS initialization entries:
[NestFactory] Starting Nest application...[InstanceLoader] TypeOrmModule dependencies initialized[InstanceLoader] AuthModule dependencies initialized[RoutesResolver] AuthController {/api/v1/auth}:[NestApplication] Nest application successfully started on port 3000
- Open Postman (or your web browser), update the
{{base_url}}variable to your new Railway domain, and execute requests to confirm that the cloud API responds identically to your local environment.
8. Summary of Production Best Practices
- Never commit secrets to version control: Always isolate credentials in
.envfiles locally and leverage cloud platform variable vaults in production. - Maximize Docker layer caching: Always copy package manifests and run
npm cibefore copying source code (COPY . .). Modifying a NestJS controller will recompile quickly without reinstalling packages. - Preserve a lean production image: Never allow the TypeScript compiler (
tsc), testing harnesses, or development dependencies into the final production image. - Leverage internal private networking: Keep public database access disabled or restricted exclusively to administrative debugging; cloud services must communicate through internal mesh hosts.